Related Blogs.
Need some inspiration? Ready to learn more about flooring? Check out these blogs.
View More Blogs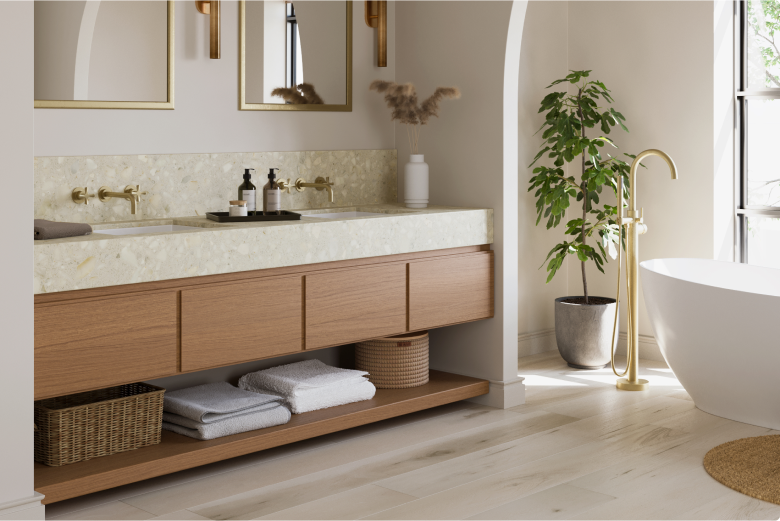
The best of the best. Get ready to meet some of our most talked-about flooring options.
Delve deeper into the exceptional details of the Modin Collection of LVP flooring. Learn more about how Modin outpaces all other vinyl plank flooring options on the market, offering a larger plank size, a much thicker than standard wear layer, and enhanced or micro bevels that accentuate its luxurious appearance. Modin planks also have a rigid core, made primarily from limestone, which makes them significantly stronger and more stable than standard vinyl. That means you can install long runs and in large spaces without the need for a transition piece.
Check Out the Full Collection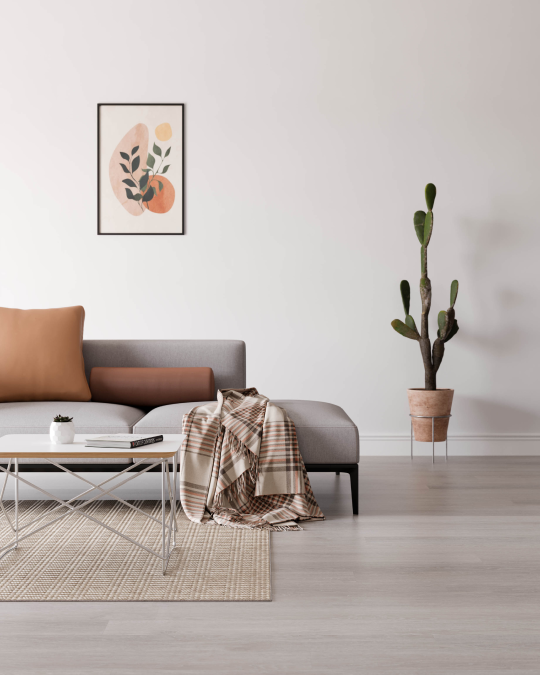


Photos below: Nakan Base, Nakan Signature, Nakan Craftsman
When you discover the difference of a Modin vinyl plank floor, you’ll want to jump for joy. Well, jump away: Modin Rigid Luxury Vinyl Plank flooring is uniquely durable, specially crafted to support the high-flying enthusiasm it inspires, as well as just about anything else you can throw at it. The Modin Collection includes three thoughtfully designed models: our Signature model, Base model, and Craftsman model. Each of these 100% waterproof flooring options features a true embossed-in-register texture, a pre-attached underlayment, and a rigid core.
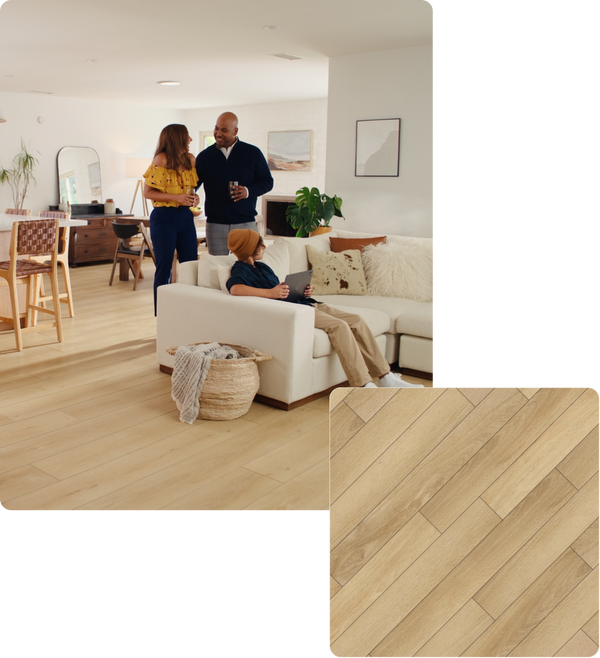

Our flagship collection is crafted with best-in-class features and specifications. Prepare to be floored.
While our planks are more dimensionally stable than other LVP products due to their rigid SPC core, you will need to leave the industry-standard 1/4" of expansion space between your floor and anything it is running up against.
Our planks are made with a very robust stone polymer composite (SPC) core. Luxury vinyl planks that feature an SPC core expand and contract much less than LVP products made with less sophisticated core materials. Out of an abundance of caution, we still require that you leave the industry standard 1/4" of expansion space when installing your floor. While your floor may not expand or contract much itself, keep in mind that the rest of your home does.
Problems typically only occur in situations where a number of factors combine to put excessive pressure on the planks. Sustained direct sun exposure and a very long run can lead to expansion-related problems if expansion space is not left. If you choose to forego expansion space in some areas, you may not run into any issues, but any problems that do arise would not be covered under our warranty.
Keep your floors clean, use felt protectors on furniture, avoid direct exposure to intense sunlight, and refrain from using products with wax or "shine" agents.
After installing the floor, we recommend an initial cleaning to remove any loose dirt or debris that may have been introduced during the installation process. While most non-residue cleaners can be used on your vinyl plank floors, it is always recommended to conduct a small test patch in an inconspicuous area, and avoid using harsh cleaners or ammonia-based cleaning products.
Keep Floors Clean
Regularly sweep and vacuum your floors. Dust acts as an abrasive. Keeping your floors dust-free will prolong the life of your finish and wear-layer. Use a vacuum that is suitable for hard surface floors.Use walk-off mats at outside entrances to reduce the amount of dirt brought into your home.Do not wax your vinyl flooring, or use any “mop and shine” products. The surface of your floor is very dense and nonporous, which prevents wax from penetrating and thus builds up a bed for yellowing and dirt collection. The same non-porous feature also provides all the protection against wear and staining that you will need. Watch this helpful Instagram Reel to learn more about how to keep your floors clean.
Furniture
When moving appliances or heavy furniture, we recommend laying a Masonite panel on your floor for the best protection.Use felt protectors on furniture to reduce indentation. As a general rule of thumb, the heavier the item, the wider the floor protector is needed. We recommend felt pads at least 1” in diameter.Be careful with rolling casters. They can damage the floor. If you choose to use them, look for the widest possible wheel you can find. Watch this helpful Instagram Reel to learn more about how to protect your floors from furniture damage.
Sunlight Exposure
The Modin Rigid Collection has a UV protective coating on top of the wear layer which dramatically slows possible fading from sunlight.To keep your floors in pristine condition, avoid exposure to direct sunlight for prolonged periods of time. During peak sunlight hours, use drapes or blinds to minimize the direct sunlight on the vinyl flooring. Most types of flooring will be affected by continuous strong sunlight. In addition, excessive temperatures are not good for resilient floors.Some natural ventilation or intermittent air conditioning in vacant homes should be considered.Long-term continuous inside temperatures over 115°F combined with strong direct sunlight will damage the flooring and cause the installation to fail. Watch this helpful Instagram Reel to learn more about how to protect your floors from sunlight damage.
No. Our floors are designed for indoor use only.
Modin LVP, like all vinyl plank flooring, is designed to be installed in temperature and moisture controlled indoor environments.
In most cases, a moisture barrier is not necessary for the sake of the flooring itself, as the Modin Collection is 100% waterproof. A moisture barrier is required if you are installing the flooring on a concrete slab, though. Using a moisture barrier will reduce the humidity in your space, prevent mold and mildew growth, and helps prevent rare issues that can arise as a result of excess moisture building up underneath the planks. We recommend using a simple 6 mil thick polyethylene moisture barrier, which should be available at your local hardware store.
Yes. Modin can be installed over in-floor radiant heating systems provided the subfloor surface does not exceed 85°F at any point.
If installing on top of a new radiant heat system, make sure the new system has been active for at least 48 hours. Some radiant systems will have a temperature "spike" the first time they are used.The initial floor temperature should not exceed 70°F for 24 hours prior to and 48 hours after installation. Thereafter the temperature should be gradually increased to the desired setting, up to but not to exceed 85°F. Radiant heating systems that are installed on top of the subfloor surface and covered with self-leveling compound are not recommended. Modin may be installed over gypsum-based subfloors.Electric heating mats that are not embedded into the subfloor are not recommended for use underneath Modin planks. Although some of these may work, in rare cases these mats can overheat and cause the underlayment to melt.Watch this video to learn more about installing your flooring over radiant heat!
The T-molding is used to transition between two floors that are the same height. Watch this video to learn more about the installation process. Before installing the T-molding, you will first want to make sure that the space left for the T-molding allows for the recommended ¼ inch expansion space between the track and the floor on either side of the track. This means leaving approximately a 1 ¼ inch gap between the two adjacent floors where the T-molding will be installed.When you are ready to install the T-molding:
If you are not sure which transition piece is most suitable for your installation, we recommend watching this helpful video on our YouTube channel, for more information.
Yes. We offer Stair Nosing made from real planks for each of our products, as well as hollow PVC full treads, and a 72" budget-friendly overlapping stair nose. The Stair Nosings are available in the 48" Signature Nosing Square and Round pieces and the 47" Base Nosing Square and Round pieces. The Base Stair Nosings are only compatible with the Base planks, but the Signature Stair Nosings are compatible with the Craftsman planks as well as the Signature planks. They can be used in combination with planks to complete a staircase.
This video shows how to install the Stair Nosings.
If you're using planks as matching risers, start at the bottom of your staircase. If you're not using risers, you can start from anywhere (some customers opt to paint their risers white or some other unique concept).
To begin, install the first riser. You may need to trim the height of the riser to match the height of your step. Sand the back of the riser and lay strips of glue on the back of the riser approximately 6-inches apart. Press the riser into place and use painter's tape to hold the riser in place while you prepare for the next step.
Cut a stair nosing and Modin plank to fit your step. You may need to cut away any existing bullnose unless the stair nosing fits over it. Once your pieces are the right size, interlock the stair nosing and the plank to form a full tread, remove the painter's tape from the previous step, and apply adhesive to the nosing and plank despite the fact that they are interlocked with one another. Press the pieces onto the stair.
On the next step, the riser will now sit on top of the tread piece so you may need to cut it shorter than you did for the first step.
Repeat these steps until you reach a landing or the top of your staircase.
Installing on landings and at the top of the staircaseInstalling on landings will be the same as the other stairs except that you'll need more than one plank to cover the entire step.
For the top edge of the staircase you will likely need to cut off the click mechanism of the stair nosing so, when installed, it will sit flush with the neighboring plank(s).
Measure the distance needed to accommodate the nosing and draw a line on your subfloor, or on top of the planks if that level of the house has already had the floors installed to the edge of the staircase. If the planks were installed to the edge, you'll need to cut them back at the line you just placed. Now the stair nosing can be glued down to complete your stair installation. You'll need to use adhesive under both the nosing and the adjacent plank(s). This will prevent any gaps from forming between your planks and the stair nosing.
We offer a full range of matching transition pieces, including T-moldings, End Caps, Reducers, Quarter Rounds and Stair Pieces.
To find the transition or trim piece you need, navigate to the product page of the color you are looking for. Scroll down to the section titled “Buy Transitions” and press the right arrow button to scroll through all the transition pieces available for that color. If you are looking for a specific piece, you can also use the search feature located on the top right corner of any page of our website.
The T-molding is used to transition between two floors that are the same height.
The Reducer is designed to "reduce" down from our planks to the subfloor. Modin Reducers can be adapted to transition between any two floors that differ in height by about 1/4".
We would recommend using the End Cap if you plan to run the floor up against something like a fireplace hearth or sliding door where you won't be able to hide the expansion gap with a baseboard or quarter round.
The Quarter Round is a perimeter piece that is used to cover the expansion gap when a baseboard cannot be used. If you are not removing your baseboards before installing our planks, you will need to leave the recommended expansion gap between the planks and the baseboards, and cover this with shoe molding or quarter rounds. Keep in mind that our quarter rounds match the color of our floors. Many people prefer to use plain, white quarter rounds that are available at local hardware stores.
If you are not sure which transition piece is most suitable for your installation, we recommend watching this helpful video on our YouTube channel, for more information.
And here is a demo on how to install each of those transition pieces:
Look for rugs that are non-staining or labeled as "colorfast" or "safe for use with hardwoods". Avoid rubber and latex mats if possible.
Regarding rugs, it is best to use non-staining vinyl-backed mats or any rug that is labeled as "colorfast." Area rugs that say "Safe for Use with Hardwoods" should be just fine. You can look at rugs with natural backings, such as cotton, jute, and woven backings.
As is the case for all vinyl floors, in some cases, plasticizers in rubber and latex can react with our planks in ways that discolor the flooring. We haven't tested our floors with every type of plasticizer, so we would recommend checking with the manufacturer of the product to be sure that it is compatible with vinyl flooring. If it is safe to use with vinyl, it is safe to use with our floor.
Most non-slip pads that are recommended for hardwood floors are a safe choice for vinyl plank. The kind to avoid, which is rarely found these days, is the old plastic mesh type, which has a tendency to leave a residue in hot temperatures. Any kind of foam pad should be fine, however. We have included a link below to some worry-free pads so that when you find a rug you love, you don't have to think about the backing!
https://www.rugpadusa.com/collections/for-vinyl-and-vinyl-plank-floors
What about Ruggable?
We reached out to Ruggable to ask them about the construction of their rugs and backings. They told us that their latex-free TPR backing material has passed all flooring tests and does not stain or leave residue on hard surface floors (including concrete). Based on that information, Ruggable rugs are safe to use with Flooret floors.
The Modin Rigid Collection has a UV protective coating on top of the wear layer which dramatically slows possible fading from sunlight.
To keep your floors in pristine condition, avoid exposure to direct sunlight for prolonged periods of time. During peak sunlight hours, use drapes or blinds to minimize the direct sunlight on the vinyl flooring. Most types of flooring will be affected by continuous strong sunlight. In addition, excessive temperatures are not good for resilient floors.
Some natural ventilation or intermittent air conditioning in vacant homes should be considered.
Long-term continuous inside temperatures over 140°F combined with strong direct sunlight will damage the flooring and cause the installation to fail.
Any products that are safe to use on vinyl floors will be suitable. We recommendBona Luxury Vinyl Floor Cleaneror any similar brand. Make sure to avoid products that contain wax, as that will build up over time.
You may wet mop your floors as much as needed; the planks are 100% waterproof. We do not recommend using steam cleaners, though. Steam cleaners can dull the floor with repeated use, so if you do want to use a steam cleaner, do so sparingly and at a lower temperature setting.
Unlike standard vinyl plank and WPC products, the Modin Collection does not require acclimation prior to installation due to its incredibly stable SPC core.
For our Modin Collection, the official recommendation for subfloor flatness is that any imperfections should not exceed 3/16" over 10'.
More than levelness, "flatness" is a much more important factor. In other words, if your entire room slopes in one direction, but is otherwise flat the entire way, your installation can be successful.
For our Modin Collection, the official recommendation for subfloor flatness is that any imperfections should not exceed 3/16" over 10'. That being said, we have had many customers tell us they have installed on considerably less flat surfaces. There are three primary concerns with the subfloor not being flat.
The first is that the click mechanism may come loose. If the subfloor changes angle too dramatically in the middle of a plank, the pressure over time may lead to the click mechanism breaking or coming loose.
The second concern is telegraphing. Precisely because vinyl floors are malleable, you can have imperfections in the subfloor telegraph to the surface and be visible.
The final concern is hollowness. When a plank bridges a valley, the hollow spots can result in the floor sounding soft or "loose" wherever there are air pockets between the floor and the subfloor.
Checking for flatness prior to your installation is the most important step you can take for a successful install.
All of the designs in the Modin Collection are 100% waterproof and include a tough top coating. However, using a steam mop on our floors can, over time, dull the finish. If you do choose to use a steam mop, do so only occasionally to avoid dulling the finish. Additionally, you can steam at half-power and at a lower steam setting.
Other, lower quality, luxury vinyl flooring products react quite badly to steam mops, bending and warping along the edges in response to the high heat, but Modin planks won’t be damaged in this manner by a steam mop.
The Modin Collection is waterproof, but if water gets under the planks, you will need to uninstall the planks, dry them and the area thoroughly, and reinstall them.
If your floor has been exposed to excessive amounts of water due to flooding, do not panic; our Modin Collection is 100% waterproof. If the water did not reach the perimeter of the installation, simply remove the water as quickly as possible.
Depending on the extent of the flooding, you may need to uninstall parts of the floor to allow the sub-floor to dry out. This is possible with the click products like Modin. Carefully uninstall the boards, taking care to not damage the click mechanisms so that you can re-install later. Before reinstalling the planks, dry them and the area thoroughly using a water pump, fans, and a dehumidifier.
We recommend using the following tools to complete your installation of Modin LVP:
Modin planks can be installed over a variety of finished floors including single-layer resilient sheet floor and tile, ceramic, marble, and terrazzo.
The surface must be in good condition and show no signs of excessive moisture conditions. If the existing floor is warped or damaged, or shows signs of mold, this could indicate moisture is coming up from the sub-floor, and installing Modin on top can lead to this moisture getting trapped and warping the existing floor, or causing the existing floor to mold and rot further. Remove the existing floor and test the subfloor moisture levels.
Do not install flooring over heavily cushioned floors or over tile installed over concrete below grade level. The grout joints in ceramic tile and marble must be leveled so they are flush with the tile surface. Additionally, the tile may require several skim coats to achieve a flat surface.
Thinking of installing over existing wood or laminate floors?Wood floors and laminate floors are very sensitive to moisture. By installing Modin Rigid on top of these floors, you risk moisture from the sub-floor getting trapped and accumulating. This can cause the wood and laminate floors to warp underneath your new flooring. This is less of a concern if your existing floor is on a second story or over a crawl space, but if the existing floor is installed directly over a slab it is always safer to remove the floor and go directly down on the slab. That being said, many of our customers have installed over existing wood floors without running into any issues.
Our collections come with top-notch scratch-resistant coatings and are built with an industry-leading, 100% virgin PVC wear layer, but accidents can happen and in the event you get a scratch on your flooring, there are a couple ways you can repair it.
Watch this helpful video on how to repair a scratch on your LVP.
How to Prevent Scratches
How to Repair a Scratch
Modin offers true embossed in register (EIR) texture, creating a surface that is convincing to the eye and to the touch. A low sheen level ensures a natural look that wears well over time.
Four-sided enhanced bevels more accurately emulate the look of real wood floors. Wider, longer planks with commercial-grade durability with easy click installation. 100% waterproof construction, from top to bottom. Independently FloorScore® certified by a US-based third party for low emissions. All together, these features create the unique look that is Modin Rigid Luxury Vinyl Plank Flooring. See it in your space.
Need some inspiration? Ready to learn more about flooring? Check out these blogs.
View More BlogsModin LVP combines the highest-quality sustainable materials with an emphasis on durability and design.
Learn More